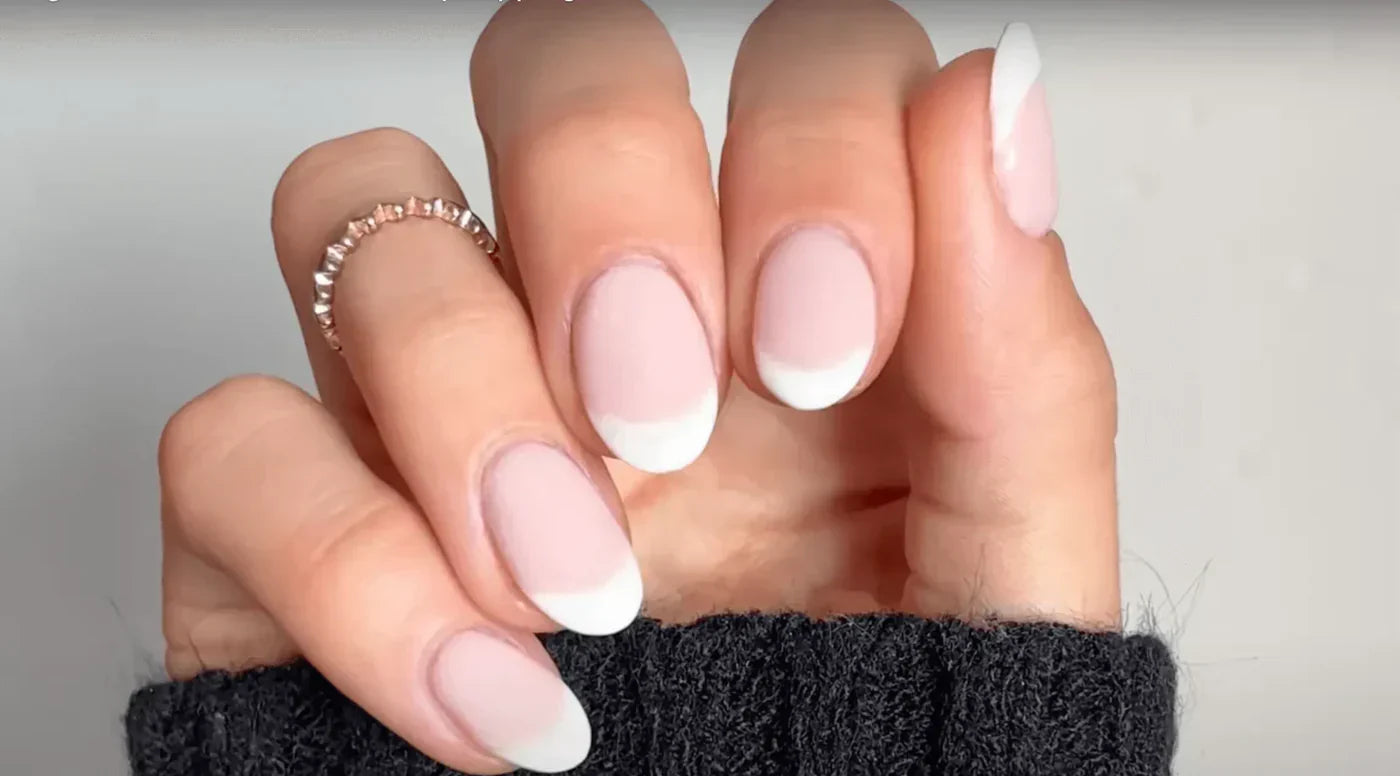
A French manicure is a timeless classic that gives your nails a polished and well-groomed look. Want to achieve this look at home using dip powder? You’ve come to the right place! Dip powder is a versatile and long-lasting way to strengthen your nails while providing a scratch-resistant finish. It’s especially ideal for those with brittle or easily splitting nails. On this page, we’ll guide you step by step on how to create a stunning French manicure with dip powder.
What Is a French Manicure with Dip Powder?
A French manicure with dip powder involves a special technique where your nails are coated with a base coat and then dipped into fine powder. This process is repeated to build layers that add strength and durability. The signature white tips of a French manicure are also created using dip powder, resulting in a smooth and natural finish. This type of manicure is not only beautiful but also highly practical—it lasts much longer than traditional nail polish.
Dip powder nails are perfect for those looking for a strong and long-lasting nail solution. If you struggle with oily nail beds that cause gel or regular polish to lift quickly, dip powder could be the perfect solution. The layered process strengthens your nails and forms a protective barrier against chipping.
What Do You Need?
Before you begin, it’s important to gather all the necessary materials to ensure a smooth application process. Here’s a checklist of what you’ll need:
- Dip Powder Kit – Includes powder, activator, and topcoat.
- White and Pink (or Beige) Dip Powder – Choose shades that complement your skin tone.
- Nail File and Buffer – For shaping and smoothing your nails.
- Cuticle Pusher – To gently push back your cuticles.
- Thin Nail Art Brush – For precise white tips.
- Nail Cleanser or Alcohol – To remove oils from your nails.
With these materials, you're ready to get started!
Step-by-Step Guide
Follow the steps below to create a flawless French manicure using dip powder.
1. Prep Your Nails
Proper preparation is key to achieving a beautiful and long-lasting manicure. Start by removing any old nail polish and thoroughly cleaning your nails. Use a cuticle pusher to gently push back your cuticles. Then, file your nails into your desired shape—whether round, square, or another style of your preference. Lightly buff the surface of your nails to create a smooth base, which helps the dip powder adhere better.
2. Apply the Base Coat
The base coat acts as an adhesive between your natural nails and the dip powder. Work on one nail at a time to prevent the polish from drying before you apply the powder. Apply a thin, even layer, avoiding contact with your cuticles. This ensures a clean, precise finish without any buildup of powder around the edges.
3. Dip into the Pink or Beige Powder
Hold your nail at a 45-degree angle and gently dip it into the pink or beige dip powder. Lightly tap off any excess powder with a soft tap on your finger. Ensure that the powder is evenly distributed across the nail. Work one nail at a time, then apply an activator to harden the layer. This step is crucial for building the strength of your manicure.
4. Create the White Tips
To achieve the iconic white tips, use a thin nail art brush and white dip powder. Dip the brush into the base coat and carefully draw a clean line along the edge of your nail. Then, dip just the tip of your nail into the white powder. This step may take a little practice, but with a steady hand, you’ll soon achieve a professional-looking result. Repeat if necessary to enhance the color intensity.
5. Repeat Layers for Strength
For extra durability and a flawless finish, you can apply a second layer of both pink and white dip powder. This not only enhances the overall appearance but also strengthens your nails, making them more resistant to everyday wear and tear.
6. Finish with a Topcoat
After applying the final activator, seal your manicure with a topcoat. This gives your nails a glossy, scratch-resistant finish, keeping them looking fresh and polished for weeks. Don’t forget to lightly buff your nails before applying the topcoat to ensure a perfectly smooth surface.
Tips & Tricks
We’d love to share some extra tips & tricks to ensure you achieve a flawless French manicure.
Choose the Right Colors
The key to a perfect French manicure lies in the subtle balance between the pink or beige base and the crisp white tips. Cool-toned pink shades work best for lighter skin tones, while warm beige tones complement darker skin tones beautifully.
Work in Thin Layers
Thin, even layers are essential for a natural-looking result. Applying layers that are too thick can create a bumpy finish and make it harder to achieve a smooth, polished look.
Keep Your Nails Oil-Free
Use a nail cleanser or alcohol to remove any oils and dirt from your nails. This improves the adhesion of the base coat and prevents your manicure from lifting prematurely.
Take Your Time
While a dip powder manicure is relatively simple, it does require patience and precision. Give yourself the time to complete each step carefully. The end result will be well worth the effort!
With these tips, you’ll be able to create a stunning French manicure at home. It may take some practice, but you’ll soon achieve beautiful results. Good luck with your French manicure! If you have any questions, the experts at Glowdip are happy to help. 💅
Leave a comment
All comments are moderated before being published.
This site is protected by hCaptcha and the hCaptcha Privacy Policy and Terms of Service apply.