Produits utilisés :
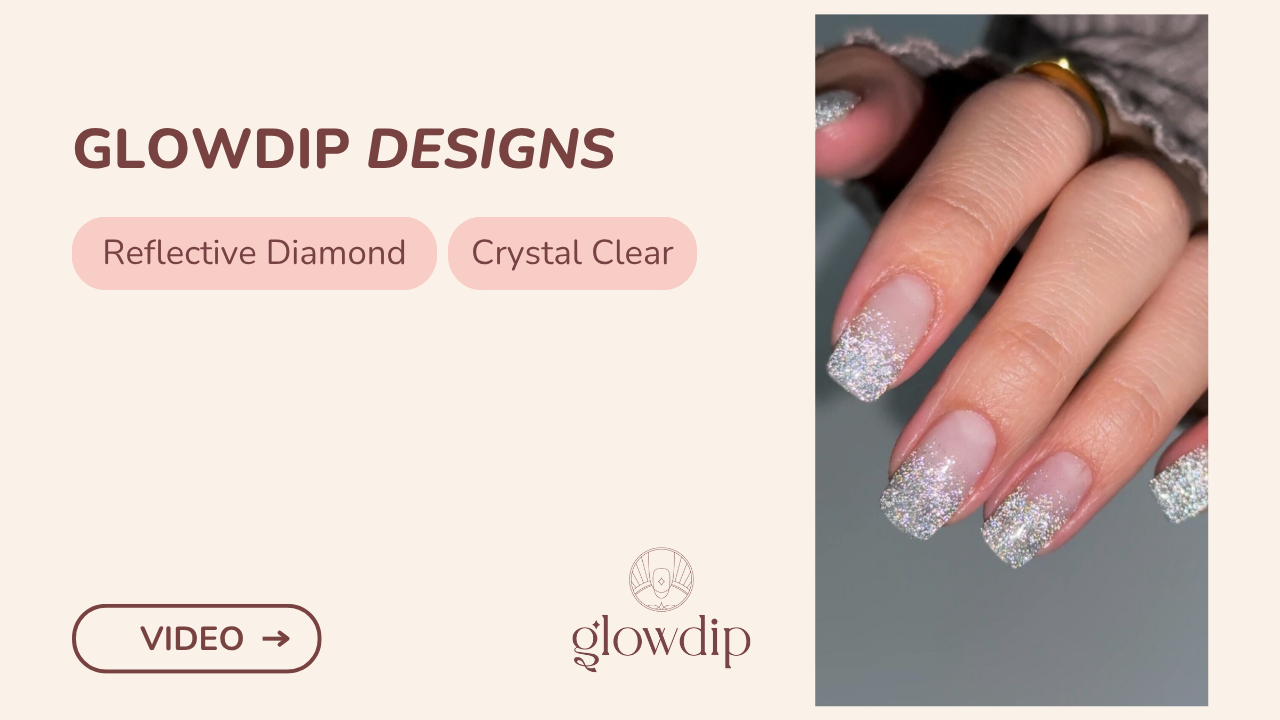
- Couleur : Reflective Diamond
Instructions étape par étape pour l'application de la poudre à tremper "Reflective Diamond + Crystal Clear"


Matériel :
- Poudre à tremper Reflective Diamond
- Poudre à tremper Crystal Clear
- Base coat
- Activateur
- Top coat
- Lime à ongles et polissoir
- Brosse à poussière ou brosse douce
Préparation
Limez vos ongles à la forme désirée et repoussez délicatement vos cuticules.
Pour une adhérence optimale, dépolissez/harmonisez légèrement les ongles naturels avec un bloc polissoir ou le côté fin d'une lime avant l'application.
Assurez-vous de retirer également les cuticules invisibles et les débris de peau pour éviter le décollement.
N'appliquez pas d'huiles ou de crèmes avant utilisation.
Étape 1 : Couche de base
Commencez par appliquer une fine couche uniforme de base coat uniquement sur le bout de vos ongles—c'est là que le design français commencera. Tant que la base coat est encore humide, trempez délicatement le bout de votre ongle dans la poudre à tremper "Reflective Diamond", en tenant votre ongle légèrement vers le bas (environ 45 degrés) pour créer un sourire doux et courbé. Tapotez l'excédent de poudre et utilisez une brosse douce pour nettoyer les particules libres autour du lit de l'ongle et des bords sans perturber la pointe.
Une fois la pointe réfléchissante fixée et propre, appliquez une autre fine couche de base coat sur tout l'ongle, en scellant soigneusement le bord où la pointe réfléchissante rencontre l'ongle naturel. Trempez immédiatement tout l'ongle dans "Crystal Clear" pour encapsuler le design de French manucure.
Assurez-vous de bien couvrir les bords, mais ne touchez pas la peau autour de l'ongle.
Étape 2 : Couche de base et poudre colorée
Répétez l'étape 1 pour une couverture, une adhérence et une intensité de couleur optimales, belles et éblouissantes.
Étape 3 : Couche d'activateur
Appliquez suffisamment d'Activator Coat sur toute la surface de l'ongle, les bords et également sur la pointe. L'Activator est l'étape la plus importante du processus d'application car il scelle et lie les couches à l'ongle, empêchant la formation de bulles d'air et assurant une adhérence longue durée. Laissez l'Activator Coat sécher pendant au moins deux minutes.
Étape 4 : Limage et polissage
Vous pouvez maintenant utiliser le côté fin de la lime ou un polissoir pour éliminer toutes les bosses et imperfections et donner aux ongles la forme et l'épaisseur désirées. Il est important de limer délicatement afin de ne pas endommager la surface et les ongles.
Étape 5 : Couche d'activateur
Répétez l'étape 3. Encore une fois, appliquez suffisamment d'Activator Coat sur tout l'ongle et son pourtour pour sceller les couches de manière optimale. Laissez ensuite l'Activator Coat sécher pendant au moins deux minutes. Pour vous assurer que l'Activator Coat est sec, vous pouvez nettoyer la surface de l'ongle avec une serviette en papier après 2 minutes. Cela permet d'éviter que le Top Coat ne durcisse en raison de la contamination.
Prévoyez 2 à 3 minutes d'attente entre le Top Coat et l'Activator Coat.
Étape 6 : Top Coat
Appliquez une fine couche de Top Coat uniformément en 2-3 coups rapides et laissez sécher pendant au moins deux minutes.
Étape 7 : Top Coat
Répétez l'étape 6. Appliquez une deuxième fine couche de Top Coat sur les ongles. Laissez ensuite sécher pendant 2-3 minutes.
Et voilà ! Avec ces étapes simples, vous créerez de beaux ongles durables avec la poudre à tremper 'Reflective Diamond + Crystal Clear'. Amusez-vous avec vos magnifiques ongles !


Laissez un commentaire
Tous les commentaires sont modérés avant d'être publiés.
Ce site est protégé par hCaptcha, et la Politique de confidentialité et les Conditions de service de hCaptcha s’appliquent.